Black and white art feels like it should be easy to vectorize: only two colors, clear contrast, no palette cleanup. Then the SVG comes back with jagged curves, hundreds of tiny dots, broken letter holes, or a white rectangle behind the logo.
The fast rule is simple: convert a black and white image to SVG when the important shape can survive as clean foreground and background. Logos, silhouettes, stamps, icons, signatures, cut files, and line drawings are strong candidates. Real black and white photos, pencil shading, newspaper texture, and low-resolution scans usually need simplification first.
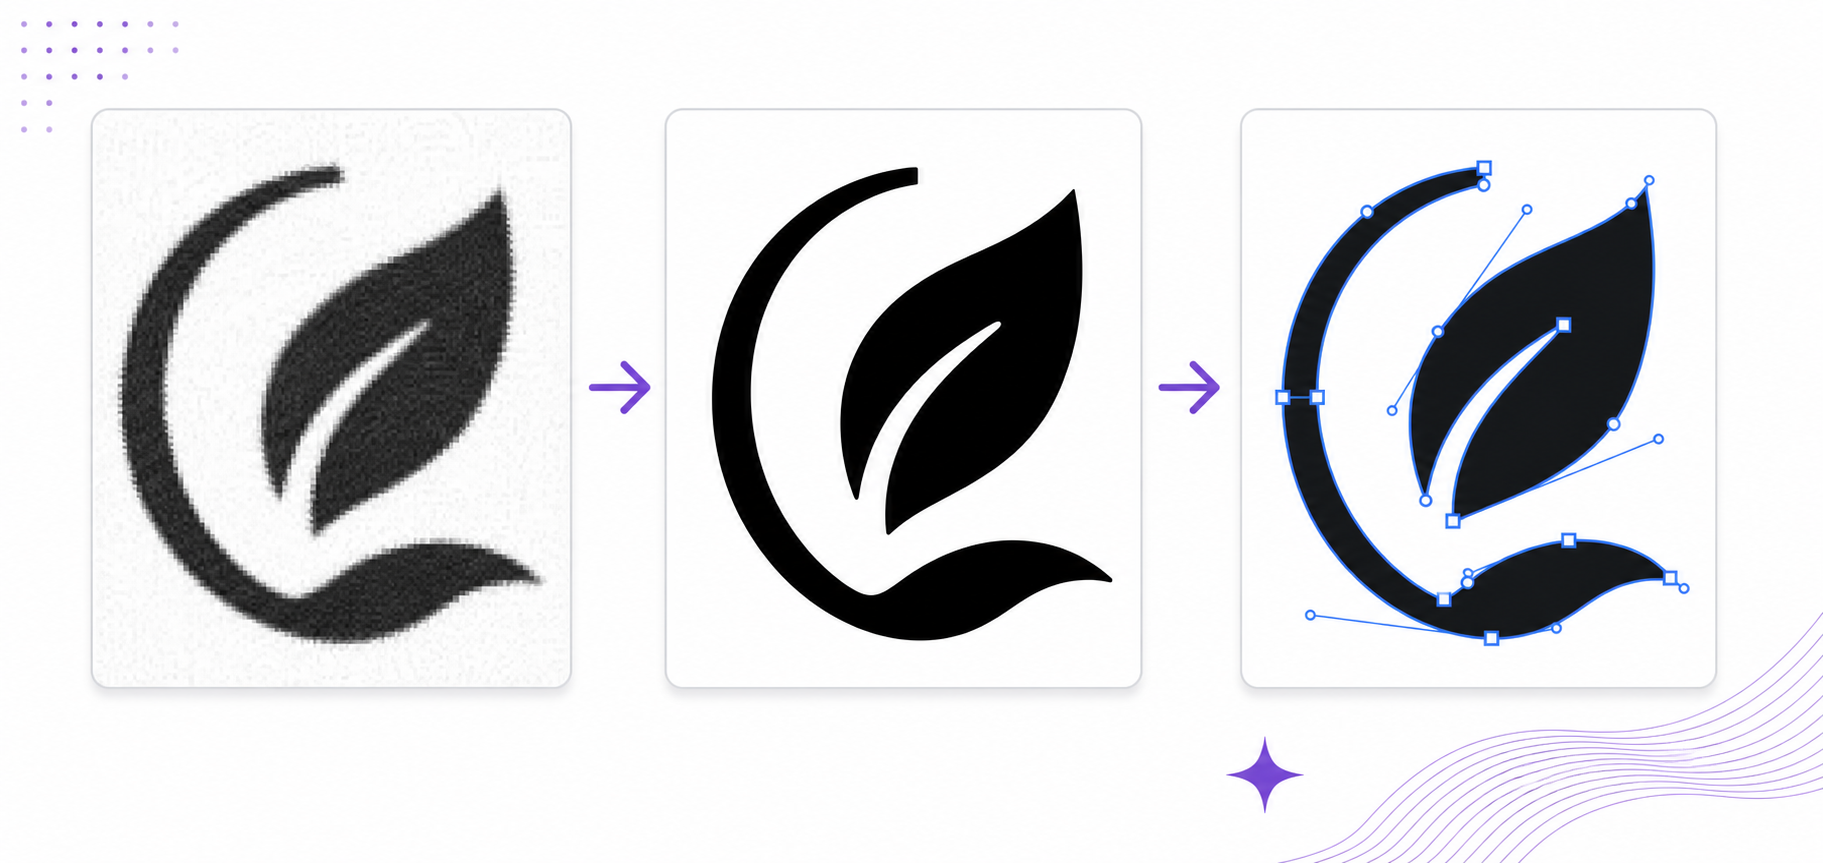
What does black and white image to SVG conversion mean?
Black and white image to SVG conversion turns a two-tone raster image into vector paths. Instead of storing pixels, the SVG stores shapes, fills, curves, coordinates, and a viewBox that can scale without pixelation.
Black and white image to SVG conversion is a raster-to-vector workflow where a converter traces the boundary between dark and light regions and rebuilds those regions as SVG geometry. MDN describes SVG as a vector image format for two-dimensional graphics, and the W3C SVG 2 specification defines the path, fill, and coordinate model behind that output.
If the source is already a clean logo, icon, stamp, or sketch, start with Image to SVG. If it is a messy JPG, scanned paper drawing, or photo-like image, clean the pixels before uploading.
When should you convert a black and white image to SVG?
Convert it when the final asset should be scalable, editable, cut-ready, printable, or easy to recolor. Do not convert it just because SVG sounds higher quality. SVG is better when the image is really made of shapes.
Use this decision table:
| Source image | Convert to SVG? | Best move |
|---|---|---|
| Black logo on transparent or white background | Yes | Clean background, convert, inspect paths |
| Signature scan | Usually | Increase contrast, remove paper texture, keep natural stroke edges |
| Ink sketch or line art | Yes | Denoise, use black-and-white mode, simplify stray marks |
| Cricut or vinyl silhouette | Yes | Convert to a single filled path, then use the Cricut SVG editing checklist to test holes |
| Stamp, seal, or badge | Yes | Preserve outer shape, simplify interior texture |
| Black and white portrait photo | Sometimes | Convert only for stencil or posterized art |
| Newspaper scan or halftone image | Usually no | Recreate or simplify before tracing |
| Tiny screenshot logo | Risky | Find a larger source or use the low-resolution logo workflow |
If the source is really a photo, read the photo to SVG converter guide before tracing it. A photo can be black and white and still be a bad SVG candidate.
How do you prepare a black and white image before SVG conversion?
Prepare the image by making the intended subject obvious and deleting accidental pixels. The converter should see one clean foreground shape, not paper grain, gray halos, compression blocks, or background shadows.
Use this cleanup checklist:
- Start with the largest original file, not a compressed chat screenshot.
- Crop tightly around the mark with a small amount of padding.
- Remove paper texture, desk shadows, scanner borders, and white boxes.
- Increase contrast until important edges are easy to see.
- Push near-black pixels toward black and near-white pixels toward white.
- Denoise speckles before conversion.
- Rebuild small text manually if the raster letters are soft.
For the broader source-cleanup sequence, use the prepare image for SVG conversion guide. For transparent edge problems, use transparent PNG to SVG before tracing.
What threshold should you use for black and white SVG conversion?
Use the threshold that preserves the real silhouette while deleting background noise. There is no universal number because every scan, JPG, logo, and photo has different lighting. The right threshold is the one where the shape still reads correctly at small size.
Think of threshold as a decision boundary:
| Threshold result | What it means | What to do |
|---|---|---|
| Lines disappear | Too much white was removed | Lower the cutoff or increase line contrast first |
| Dots and dust appear | Too much noise became black | Denoise, clean the background, or raise noise filtering |
| Letter holes fill in | Interior counters are too small or soft | Use a higher-resolution source or rebuild text |
| Edges look stair-stepped | Source resolution is too low | Find a larger file or upscale carefully before conversion |
| Curves look melted | Smoothing is too aggressive | Reduce smoothing and clean paths manually |
The mistake is treating threshold like a quality slider. It is a tradeoff: more sensitivity catches faint detail, but it also catches junk. For logos and cut files, fewer intentional paths beat many accidental ones.
How do you convert a black and white logo to SVG?
Convert a black and white logo by recovering the logo mark, not the raster file. Crop the logo, remove the background, make the mark high-contrast, trace it, then inspect the output before using it as a brand asset.
Follow this workflow:
- Find the cleanest original file you can.
- Crop out margins, packaging, website chrome, or screenshot background.
- Straighten the mark if it came from a photo or scan.
- Remove gray paper texture and edge halos.
- Convert with Image to SVG.
- Open the result in SVG Editor.
- Delete speckles and background rectangles.
- Check the logo at favicon size and large print size.
- Optimize only after the visual shape is correct.
If the source is old, blurry, or tiny, use the low-resolution logo to SVG guide. For black-and-white logo variants inside a full brand system, the responsive SVG logo variants guide explains when to keep separate one-color, reversed, and favicon versions.
How do you convert line art, sketches, and signatures to SVG?
Line art converts well when the line is deliberate, dark, and separated from the background. The goal is not to preserve every pencil fiber. The goal is to preserve the intended stroke.
Use this sequence:
- Scan or photograph the art evenly, without shadows.
- Convert to grayscale before pushing it to black and white.
- Remove paper texture and dust.
- Keep intentional line weight changes.
- Avoid over-smoothing corners, handwritten loops, and rough ink character.
- After conversion, inspect broken gaps and accidental islands.
For hand drawings, the focused hand-drawn sketch to SVG guide gives a better workflow than a generic converter pass. If the sketch came from a screenshot, use the screenshot to SVG converter guide first.
If the artwork is specifically handwriting, use the signature-to-SVG workflow to preserve thin joins, loops, flourishes, and intentional pen details without tracing paper texture.
Why does a black and white SVG get jagged or bloated?
A black and white SVG gets jagged or bloated when the converter traces accidental pixels as real geometry. Common causes include low resolution, JPG compression, anti-aliased gray edges, scan dust, paper texture, uneven lighting, and overly sensitive threshold settings.
Check these failure modes:
| Problem in output | Likely source problem | Fast fix |
|---|---|---|
| Tiny dots around the mark | Dust, JPG artifacts, paper grain | Denoise and remove background before conversion |
| White box behind logo | Background was traced as a shape | Remove background or delete rectangle in editor |
| Lumpy curves | Low-resolution edge pixels | Use a larger source and reduce over-smoothing |
| Broken letters | Raster text was too small | Rebuild text with a real font |
| Filled holes in letters or icons | Threshold swallowed counters | Improve resolution and contrast |
| Huge file size | Too many tiny paths | Clean source, simplify, then optimize |
If the SVG already exists and the visible shape is wrong, fix paths before minifying. The edit SVG paths online guide shows when to manually repair anchor points, holes, curves, and fragments.
What is the easiest path for most users?
The easiest path is to convert only after the image looks like the SVG you want: clean silhouette, strong contrast, minimal noise, and no background you would not want in the final file. One good conversion beats ten random threshold experiments.
Use this final preflight:
- The subject reads clearly in one color.
- The background is clean or intentionally included.
- The file is not a tiny screenshot.
- Text is large enough to trace or will be rebuilt manually.
- Speckles and scan dust are gone.
- The SVG needs to be scalable, editable, recolorable, printable, or cut-ready.
When those boxes are checked, run the file through Image to SVG, inspect it in SVG Editor, and use SVG Optimizer only after the artwork looks right.
FAQ
Can you convert a black and white image to SVG?
Yes. Black and white images are often good SVG candidates because the converter can trace a clear edge between foreground and background. The result is best when the image has high contrast, a clean background, enough resolution, and no JPG speckles.
What is the best way to convert a black and white logo to SVG?
The best way to convert a black and white logo to SVG is to crop tightly, remove the background, push the mark to true black and true white, convert with an image-to-SVG tool, then inspect the paths for speckles, holes, warped text, and lumpy curves.
Why does my black and white SVG have tiny dots?
Tiny dots usually come from scan dust, JPG compression, paper texture, anti-aliased gray pixels, or a threshold that is too sensitive. Clean the raster source before conversion, then remove leftover fragments in an SVG editor.
Should a black and white photo be converted to SVG?
Convert a black and white photo to SVG only if you want a stencil, silhouette, engraving, posterized portrait, or flat illustration. Keep it raster if the photo needs realistic texture, shadows, skin tone, or fine detail.
Next step
Try Image to SVG with a cleaned, high-contrast version of your black and white image. If the first result has speckles or warped text, do not keep retrying randomly. Clean the source, convert again, then finish the file in SVG Editor.
Converting black-ink tattoo artwork? The tattoo design to SVG guide adds source-image, line-weight, negative-space, and stencil handoff checks to this black-and-white workflow.
Working with deliberately blocky sprites or icons? The pixel art to SVG guide explains how to preserve the original grid, palette, transparency, and hard square edges.
Create your own SVG graphics with AI
Describe what you need, get a production-ready vector in seconds. No design skills required.
About This Article
This article was written by SVG Genie Team based on hands-on testing with SVG Genie’s tools and years of experience in vector design and web graphics. All recommendations reflect real-world usage and are reviewed by the SVG Genie editorial team for accuracy.
About the Author
SVG Genie Team
SVG Design Expert & Technical Writer at SVG Genie
SVG Genie Team is a vector design specialist and technical writer at SVG Genie with years of hands-on experience in SVG tooling, AI-assisted design workflows, and web graphics optimization. Their work focuses on making professional vector design accessible to everyone.
More articles by SVG Genie Teamarrow_forward