A low-resolution logo is a trap because it looks like an easy conversion job. Upload the tiny PNG, export SVG, done. Then you open the file and find jagged curves, warped letters, fuzzy edges, a white box, and hundreds of accidental paths.
The fix is to stop treating SVG conversion like magic upscaling. A converter can trace visible pixels, but it cannot recover the original design file if the source no longer contains enough information.
The fastest rule: trace simple marks, clean or upscale borderline files, and recreate logos when the source is tiny, blurry, text-heavy, or brand-critical. If the first output changes the identity of the logo, do not keep forcing settings. Use the low-resolution image as a reference and build a cleaner SVG instead.
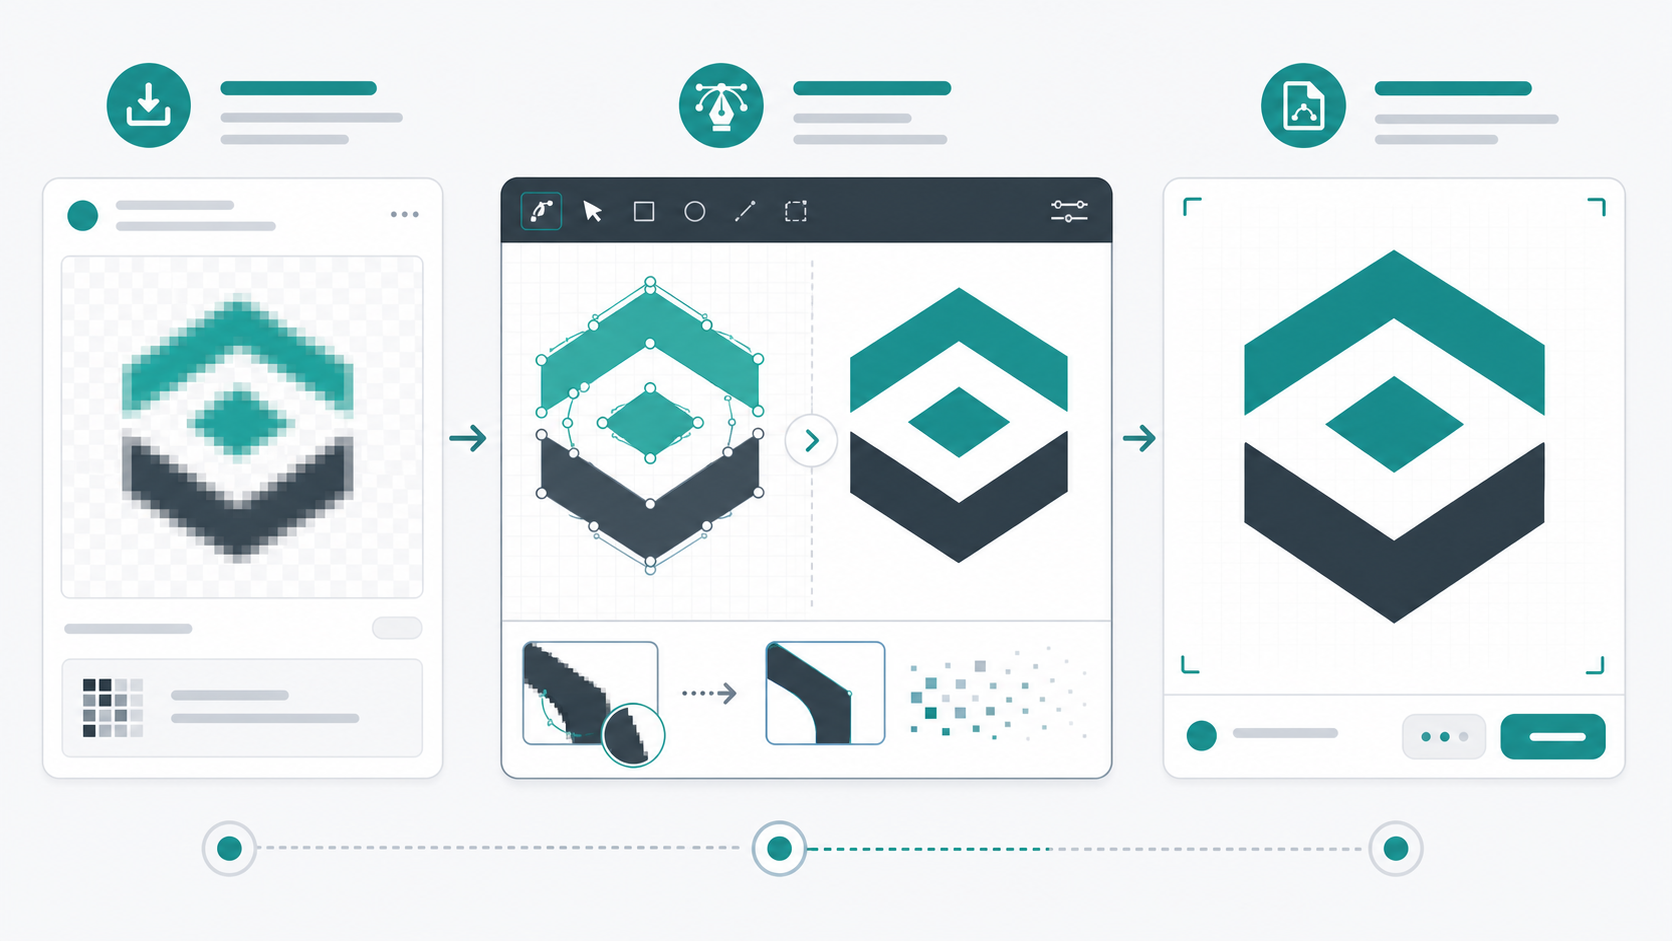
Can you convert a low-resolution logo to SVG?
Yes, you can convert a low-resolution logo to SVG when the logo has clear contrast, simple shapes, and enough visible edge information for tracing. The lower the resolution, the more you need to inspect the output instead of trusting the preview. A bad trace is still scalable, but it scales the flaws too.
A low-resolution logo is a raster logo file with too few pixels to describe its edges, typography, spacing, or small details cleanly at the size you need. In practice, that usually means a small website footer image, a screenshot, an email signature graphic, or a compressed JPG someone renamed as a PNG.
SVG is the right final format for most logos because it stores shapes instead of fixed pixels. MDN's SVG documentation describes SVG as a web vector format, while the W3C SVG specification defines the geometry behind paths, shapes, fills, and viewBox behavior. The catch is that raster-to-vector conversion has to infer that geometry from pixels.
For a quick first pass, upload the best available source to Image to SVG. If the file is specifically a transparent PNG logo, the PNG to SVG converter gives you a focused starting point.
Should you trace, upscale, clean, or recreate the logo?
Trace the logo when the source is simple and recognizable. Clean or upscale it when the main shape is good but the edges are noisy. Recreate it when the source lacks enough detail for a faithful SVG. The decision should be based on the visible output, not on the hope that another converter will guess better.
Use this decision table before spending time on settings:
| Source logo condition | Best move | Why |
|---|---|---|
| Flat icon, high contrast, limited colors | Trace to SVG | The converter can identify real shape boundaries |
| Transparent PNG with edge speckles | Clean source, then trace | Speckles can become SVG fragments |
| Pixelated but simple symbol | Upscale lightly, then trace | Larger edges may smooth better |
| Tiny wordmark from a website footer | Recreate text and mark | Traced letters usually warp |
| Screenshot with background UI | Crop and clean first | The converter may trace the page, not just the logo |
| Gradient, shadow, or glossy badge | Simplify or recreate | SVG can bloat when it tries to mimic effects |
| Permanent brand master file | Recreate or manually clean | Accuracy matters more than speed |
If your source is already producing jagged edges, white boxes, or thousands of paths, read the symptom guide to fix bad image-to-SVG conversion before converting again.
What settings work best for a pixelated logo?
For a pixelated logo, start with fewer colors, moderate smoothing, high noise removal, transparent background cleanup, and conservative path simplification. These settings reduce accidental pixel fragments without melting the logo into a different shape. Change one setting at a time so you know what improved or damaged the trace.
Start here:
| Setting | First choice | Watch for |
|---|---|---|
| Colors | 2-8 | Too many near-identical edge colors |
| Smoothing | Medium | Corners turning round or letters getting soft |
| Noise removal | High | Intentional dots or small counters disappearing |
| Background | Remove or transparent | White boxes and matte halos |
| Simplification | Low to medium | Curves changing shape |
| Test sizes | 16px, 64px, 400px | Logo only looking good in one preview |
Do not use maximum smoothing to hide a bad source. Smoothing can reduce stair-steps, but it can also change a letter, round off a sharp mark, or make a badge look melted. For logo work, faithful beats artificially smooth.
The PNG to SVG converter settings guide has more detail on color count, smoothing, noise removal, and background handling when the source is a PNG.
Should you upscale the logo before SVG conversion?
Upscale the logo before SVG conversion only when the original is small but still readable. Upscaling can give the tracer a smoother edge map, especially for simple marks. It cannot recover missing letterforms, hidden corners, exact brand colors, or details that were destroyed by compression.
Use upscaling as a preflight step, not as the final quality fix:
- Find the largest original logo file first.
- Prefer PNG over a compressed JPG copy.
- Remove background junk before enlarging.
- Upscale 2x or 4x only if the logo remains recognizable.
- Convert the upscaled version to SVG.
- Compare the SVG against the original at real use sizes.
- Recreate the mark if the trace changes the identity.
This matters because PNG is a raster format. The W3C PNG specification defines PNG around pixel-based image data, which is perfect for screenshots and transparent raster assets but not a substitute for the original vector design. Enlarging a PNG creates more pixels; it does not restore the designer's source paths.
If the logo came from a screenshot, use the screenshot to SVG converter guide first. Screenshots add browser backgrounds, anti-aliased UI edges, and tiny text that make tracing harder.
How do you clean a low-quality logo before tracing?
Clean the raster source by removing everything that is not part of the logo: background blocks, compression artifacts, halos, shadows, stray pixels, and unnecessary whitespace. A cleaner source gives the converter fewer false shapes to trace and usually creates a smaller, more editable SVG.
Use this preflight checklist:
- Start from the largest file you can find.
- Crop excess whitespace without clipping the mark.
- Remove the background if the final logo should be transparent.
- Delete speckles, halos, scan dust, or JPG blocks.
- Flatten subtle shadows if they are not part of the identity.
- Reduce the palette for flat logos.
- Keep intentional small shapes such as dots, counters, and symbols.
- Save a clean PNG copy before uploading.
After conversion, inspect the SVG in SVG Editor. Delete accidental background rectangles, fix brand colors, and check whether the viewBox is centered. Then use SVG Optimizer only after the visible artwork is correct.
Why does traced logo text look warped?
Traced logo text looks warped because the converter turns letters into shapes based on pixels, not font instructions. Small raster letters contain anti-aliasing, blur, and compression noise. When those pixels become paths, the wordmark can look wavy, uneven, or slightly wrong even if the SVG is technically valid.
Rebuild text when:
- the business name must be exact
- the logo will become a brand master file
- the source is a screenshot or email signature
- small letters look lumpy after tracing
- the font is known or easy to match
- kerning and spacing matter
Trace text only when the wordmark is large, bold, final, and visually acceptable after conversion. Even then, test it at header size, favicon size, and large print-preview size. Tiny text that looks passable in a preview can become embarrassing on a banner or pitch deck.
For AI-generated logos, the AI logo to SVG converter guide has a stricter workflow for fake lettering, gradients, and prompt-generated marks.
What is the safest workflow in SVG Genie?
The safest workflow is to convert the best available source, inspect the first SVG, and decide quickly whether to clean, edit, or recreate. Do not loop through random tools for an hour. The first failure usually tells you what the source needs.
Use this sequence:
- Upload the largest logo file to Image to SVG.
- Choose logo-friendly settings: low colors, moderate smoothing, high noise removal.
- Export the first SVG.
- Open it in SVG Editor.
- Check edges, text, colors, background, and viewBox.
- If the mark is close, clean paths and optimize.
- If the mark is wrong, recreate it with Logo Maker or use the raster as a reference.
- Save the final SVG as the master file, then export PNG fallbacks only where needed.
For older client assets, this workflow is faster than arguing with a bad trace. You either get a usable vector in minutes or you learn that the raster source is not good enough to be the master.
How do you know the final SVG is good enough?
A final logo SVG is good enough when it is visually faithful, clean at multiple sizes, transparent where expected, reasonably simple inside, and easy to reuse. The file should not merely scale. It should scale without preserving the pixel damage that caused the problem in the first place.
Check the final file against this list:
- The logo matches the intended silhouette.
- Curves are smooth without losing sharp corners.
- Text is readable and not wavy.
- Background is transparent unless intentionally filled.
- Brand colors are exact or deliberately simplified.
- The viewBox is tight but not clipped.
- The SVG is not full of random tiny fragments.
- It still works at favicon, header, and large preview sizes.
- The optimized file looks identical to the unoptimized version.
If the logo fails on silhouette or text, recreate it. If it only fails on background, path count, or color cleanup, edit it. That distinction saves time.
FAQ
Can you convert a low-resolution logo to SVG?
Yes, but the result depends on the source. Simple, high-contrast marks can often be traced into usable SVG files. Tiny, blurry, compressed, text-heavy, or gradient-heavy logos usually need cleanup, upscaling, or recreation instead of direct tracing.
Should I upscale a pixelated logo before converting it to SVG?
Upscale only when it helps the converter see cleaner edges. Upscaling can make a tiny logo easier to trace, but it cannot recover missing typography, hidden corners, or brand detail that is no longer visible.
Why does my low-quality logo SVG have jagged edges?
Jagged edges happen when the converter follows pixel stair-steps too closely. Start with the largest source file, remove compression artifacts, use moderate smoothing, and recreate the logo if smoothing changes the mark.
Is SVG always better than PNG for logos?
SVG is usually better as the master format for logos because it scales cleanly and stays editable. PNG is still useful as a fallback for email, social platforms, app icons, and places that require raster uploads.
When should I recreate a logo instead of tracing it?
Recreate the logo when the source is under roughly 200 pixels wide, visibly blurry, screenshot-only, text-heavy, or important enough to become a permanent brand master file.
Bottom line
A low-resolution logo can become a clean SVG when the design is simple enough and the source still contains usable edges. But if the file is tiny, blurry, or text-heavy, tracing will only make a scalable version of the damage.
Start with Image to SVG, inspect the result, and make the call quickly: clean, edit, optimize, or recreate. That is the shortest path from a rough logo file to a production-ready SVG.
Create your own SVG graphics with AI
Describe what you need, get a production-ready vector in seconds. No design skills required.
About This Article
This article was written by SVG Genie Team based on hands-on testing with SVG Genie’s tools and years of experience in vector design and web graphics. All recommendations reflect real-world usage and are reviewed by the SVG Genie editorial team for accuracy.
About the Author
SVG Genie Team
SVG Design Expert & Technical Writer at SVG Genie
SVG Genie Team is a vector design specialist and technical writer at SVG Genie with years of hands-on experience in SVG tooling, AI-assisted design workflows, and web graphics optimization. Their work focuses on making professional vector design accessible to everyone.
More articles by SVG Genie Teamarrow_forward