Most people search for a photo to SVG converter because they want the same photo, but sharper, smaller, scalable, and editable. That is the painful part: SVG does not magically upgrade a photo. It has to rebuild the image as shapes.
The fast rule is simple: convert a photo to SVG only when the final result should look like vector art, not like a realistic photo. A silhouette, icon, line drawing, badge, sticker, engraving, or simplified product outline can work beautifully. A detailed portrait, food photo, fabric texture, or full-scene photograph usually turns into a huge SVG that is worse than the original image.
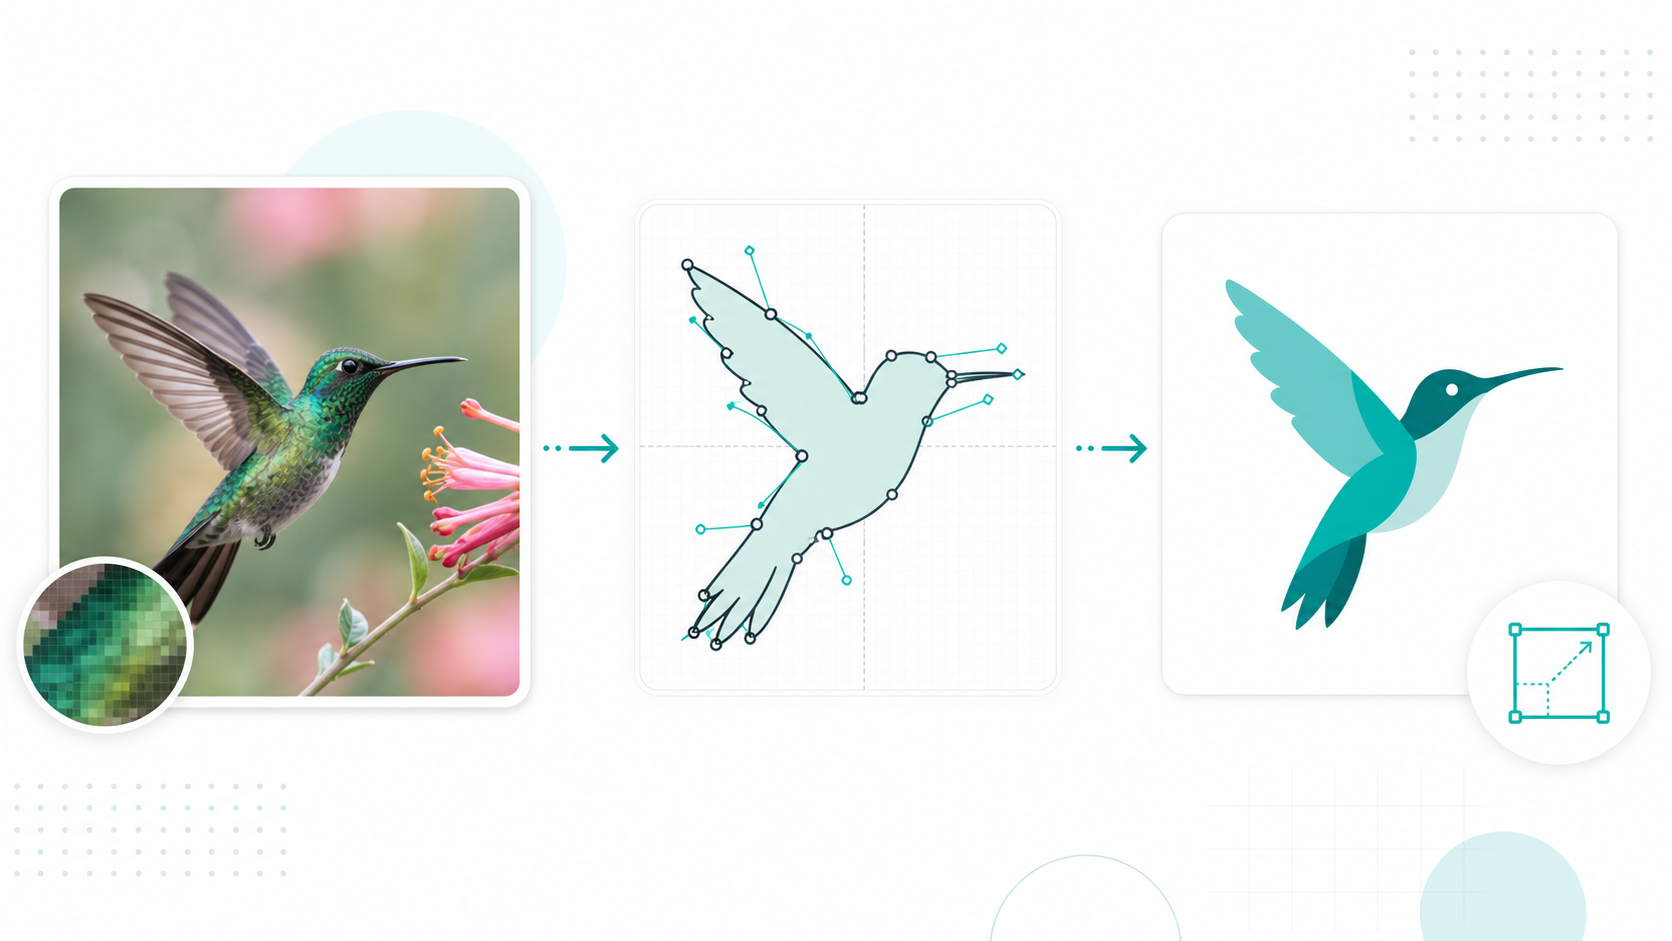
What does a photo to SVG converter actually do?
A photo to SVG converter turns pixels into vector instructions. Instead of storing every pixel from a JPG or PNG, the output SVG stores shapes, paths, fills, strokes, and coordinates that can scale without pixelation.
Photo to SVG conversion is a raster-to-vector workflow that interprets a photo and rebuilds it as SVG geometry. MDN defines SVG as a vector image format for two-dimensional graphics, and the W3C SVG specification defines how that geometry is represented. That makes SVG excellent for clean shapes, but expensive for photographic detail.
If your source is already logo-like, icon-like, or illustration-like, start with Image to SVG. If your source is a normal photo, use the decision table below before uploading it.
Should you convert this photo to SVG?
Convert the photo only if the useful information can be reduced to shapes. Keep it raster if the useful information depends on fine texture, realistic light, skin tone, lens blur, shadows, or thousands of subtle colors.
Use this quick decision table:
| Source photo | Best output | Why |
|---|---|---|
| Product photo for an ecommerce page | JPG, PNG, AVIF, or WebP | Realistic material, lighting, and detail matter |
| Product outline for a manual or icon | SVG | Clear shape matters more than realism |
| Portrait photo | Raster image | Skin tone and texture do not vectorize cleanly |
| Portrait sticker or avatar style | Simplified SVG illustration | The goal is graphic interpretation, not realism |
| Hand-drawn sketch photo | SVG after cleanup | Lines can become clean vector paths |
| Logo photographed from packaging | Recreate or trace as SVG | The final mark should be crisp and editable |
| Background scene or landscape | Raster image | Too many gradients and organic details |
| Black-and-white silhouette | SVG | Strong edges and few colors are ideal |
This is where many conversions fail. The user wants "photo to SVG," but the real job is often "turn this photo into a clean vector-style graphic." Those are different requests.
If the photo has already been simplified into a true two-tone silhouette, use the black and white image to SVG guide for threshold cleanup before conversion.
What is the best workflow to turn a photo into SVG?
The cleanest workflow is to simplify the photo before conversion, convert only the graphic subject, inspect the path count, and optimize after the visible result is correct. Do not upload a full-resolution camera photo and hope the converter understands your design intent.
Follow this sequence:
- Crop the photo to the exact subject you want.
- Remove the background if it should not be part of the SVG.
- Increase edge contrast around the subject.
- Reduce noise, grain, and JPG artifacts.
- Reduce colors if you want a flat illustration.
- Convert with Image to SVG.
- Open the result in SVG Editor and delete accidental fragments.
- Run SVG Optimizer only after the artwork looks right.
The order matters. Optimization can shrink markup, but it cannot decide which photo details should never have been traced. For source cleanup, use the broader prepare image for SVG conversion guide before you run another conversion.
Why do photo-to-SVG files become so large?
Photo-to-SVG files become large because photography has continuous tone. A converter has to approximate highlights, shadows, hair, fabric, reflections, background blur, compression blocks, and near-identical colors using vector objects.
That creates three problems:
- Too many paths: tiny color regions become separate shapes.
- Poor editability: the output may be made of fragments instead of meaningful objects.
- Slow rendering: the browser has to parse and paint complex SVG markup.
SVG is compact when it describes clean geometry. It is not compact when it imitates every pixel in a photo. If your converted file is bigger than the original JPG or PNG, the format choice is probably wrong. The focused troubleshooting guide on bad image-to-SVG conversions explains how to diagnose jagged edges, huge files, white boxes, and warped text.
How do you convert a photo of a logo to SVG?
For a photo of a logo, your goal is not to preserve the photo. Your goal is to recover the logo mark. Crop tightly, correct perspective, remove background texture, increase contrast, and trace only the clean logo shape.
Use this logo-photo workflow:
- Crop out packaging, desk surface, shadows, and camera borders.
- Straighten the logo so horizontal and vertical edges are actually aligned.
- Remove glare and background color if possible.
- Convert a high-contrast version first.
- Rebuild text with the correct font instead of accepting warped traced letters.
- Compare the output against the original brand mark before using it publicly.
If the logo source is tiny or damaged, do not force a bad trace. The guide on converting a low-resolution logo to SVG gives a better recovery path for old client assets, website screenshots, and blurry email attachments.
How do you convert a portrait photo to SVG?
Convert a portrait photo to SVG only when you want a simplified avatar, stencil, line-art portrait, sticker, or posterized illustration. If you need a realistic headshot, SVG is the wrong output.
For a stylized portrait, reduce the problem before conversion:
- Separate the subject from the background.
- Choose a graphic style: silhouette, line art, two-tone, flat color, or posterized.
- Remove small facial texture that you do not want as vector fragments.
- Keep the number of colors low.
- Inspect eyes, mouth, hairline, and glasses carefully after conversion.
The failure mode is obvious: the SVG may look impressive when zoomed out, but become a pile of tiny shapes when edited. If the portrait must remain recognizable and professional, generate or draw a vector-style portrait instead of tracing every photo detail.
What settings matter most for photo-to-SVG conversion?
The most important settings are color count, smoothing, noise removal, background handling, and simplification. Treat them as design controls, not quality sliders.
| Setting | Raise it when | Lower it when |
|---|---|---|
| Color count | You need posterized color blocks | The SVG has too many fragments |
| Smoothing | Edges look jagged or stair-stepped | Corners and letterforms look melted |
| Noise removal | Grain, dust, and JPG blocks are being traced | Intentional small details disappear |
| Background removal | You need a transparent SVG subject | The background is part of the design |
| Simplification | Path count is too high after cleanup | The shape loses identity |
For PNG-specific controls, read the PNG to SVG converter settings guide. For general format strategy, the image-to-SVG methods guide compares AI vectorization, Illustrator Image Trace, Inkscape, command-line tools, and manual recreation.
What is the easiest path for most users?
The easiest path is to stop asking whether a photo can become SVG and ask what the final asset is supposed to do. If it must scale as an editable icon, logo, cut file, sticker, diagram, or flat illustration, convert or recreate it as SVG. If it must remain visually realistic, keep it raster.
Use this checklist before converting:
- The final asset should look graphic, not photographic.
- The subject has clear edges.
- The background is removed or intentionally kept.
- The image has enough resolution for clean edges.
- The color count can be simplified without hurting the result.
- The output needs to be scalable, editable, animated, or cut-ready.
If those boxes are mostly checked, use Image to SVG, then clean the result in SVG Editor. If they are not checked, export the photo as JPG, PNG, AVIF, or WebP and save yourself the pain.
FAQ
Can you convert a photo to SVG?
Yes, you can convert a photo to SVG, but it works best when the photo has a clear subject, strong edges, simple colors, and a graphic look. Detailed portraits, product photos, and textured scenes usually become large, hard-to-edit SVG files unless you simplify them first.
What is the best way to turn a photo into SVG?
The best way to turn a photo into SVG is to decide whether you need a traced vector, a simplified illustration, or a normal raster image. For logos, sketches, silhouettes, and flat product outlines, clean the photo first and use an image-to-SVG converter. For realistic photos, keep JPG, PNG, AVIF, or WebP.
Why does a photo-to-SVG conversion create a huge file?
A photo-to-SVG conversion creates a huge file because the converter has to describe shadows, texture, noise, gradients, and tiny color changes as vector shapes. The more photo detail you preserve, the more paths and fills the SVG needs.
Should I convert a portrait or product photo to SVG?
Convert a portrait or product photo to SVG only when you want a simplified graphic style, such as a silhouette, sticker, engraving, icon, or flat illustration. If you need realistic detail, a compressed raster format is the better output.
Next step
Try Image to SVG with a cropped, high-contrast photo when you want vector-style output. If the first result looks noisy, do not keep retrying randomly. Clean the source, reduce detail, and use SVG Editor to remove the few fragments that do not belong.
Create your own SVG graphics with AI
Describe what you need, get a production-ready vector in seconds. No design skills required.
About This Article
This article was written by SVG Genie Team based on hands-on testing with SVG Genie’s tools and years of experience in vector design and web graphics. All recommendations reflect real-world usage and are reviewed by the SVG Genie editorial team for accuracy.
About the Author
SVG Genie Team
SVG Design Expert & Technical Writer at SVG Genie
SVG Genie Team is a vector design specialist and technical writer at SVG Genie with years of hands-on experience in SVG tooling, AI-assisted design workflows, and web graphics optimization. Their work focuses on making professional vector design accessible to everyone.
More articles by SVG Genie Teamarrow_forward