An SVG can look perfect and still be a performance problem. The logo is sharp, the icon scales, the illustration opens in the browser, and then you notice the file is 240 KB because it came from Illustrator, Figma, or an auto-traced PNG with thousands of tiny paths.
The fast rule is:
Use an SVG path optimizer to remove metadata, lower decimal precision, minify markup, and simplify only the paths that can change without visible damage. If the file was traced from a raster image, clean the design first and optimize second.
People using an SVG path optimizer are not asking what SVG is. They already have a real file that is too large, too noisy, or too hard to edit. The useful answer is how to make it lighter without wrecking curves, clipping artwork, breaking IDs, or removing the parts your site still needs.
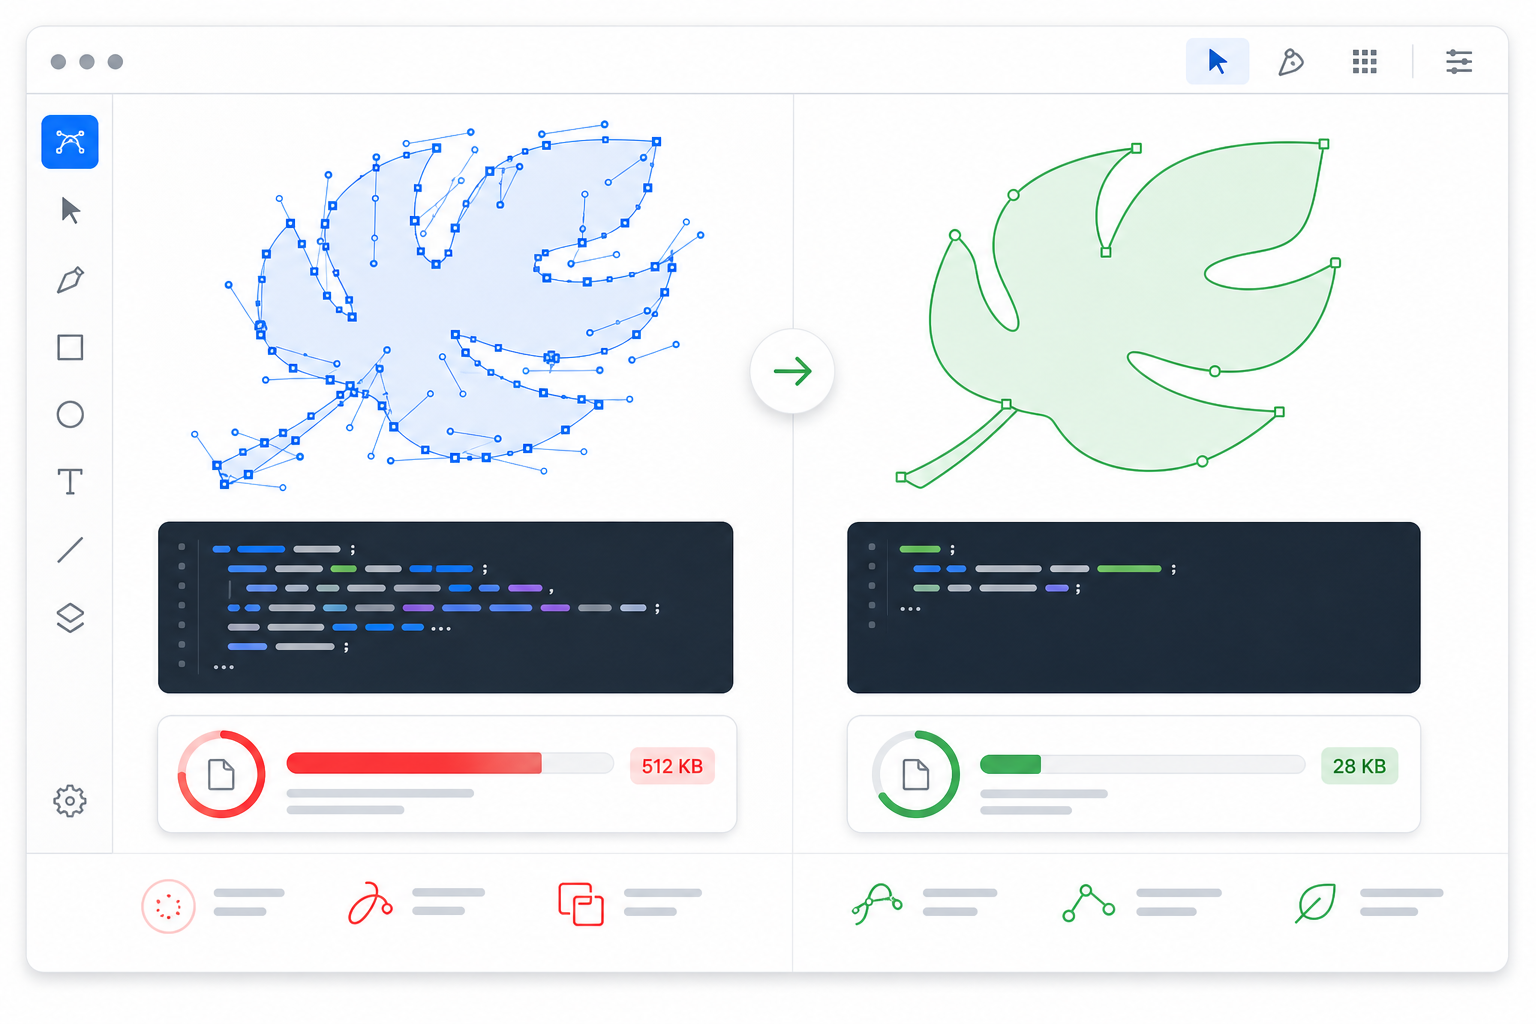
What does an SVG path optimizer actually do?
An SVG path optimizer reduces the amount of code needed to draw the same vector graphic. It can remove editor metadata, shorten numbers, collapse whitespace, convert commands, delete unused definitions, and simplify path data. A good optimizer makes the file smaller while preserving the visible shape and the parts your website depends on.
An SVG path optimizer is a tool that rewrites SVG markup and path data to reduce file size without intentionally changing the rendered graphic. The path data is the d attribute inside elements like <path d="M10 10 C20 5 30 5 40 10" />.
Useful technical references:
If you are deciding whether to keep one, two, or three digits after each coordinate, use the SVG decimal precision guide before simplifying paths. It gives a visual threshold test for reducing numeric noise without flattening curves or opening seams.
Most SVG optimization has two layers:
| Optimization Layer | What It Changes | Usually Safe? | Main Risk |
|---|---|---|---|
| Metadata cleanup | Comments, editor tags, hidden app data | Yes | Removing licensed attribution if required |
| Decimal precision | 12.345678 becomes 12.35 | Usually | Curves shift if precision is too low |
| Markup minification | Whitespace and long attributes | Yes | Harder manual debugging |
| Path command cleanup | Converts or merges path commands | Usually | Animation path matching can break |
| Shape merging | Combines paths or groups | Sometimes | CSS, hover states, and editing get harder |
| ID cleanup | Removes or renames IDs | Sometimes | Gradients, masks, CSS, JS, and links can break |
| ViewBox cleanup | Crops or normalizes canvas bounds | Sometimes | Artwork can be clipped or repositioned |
If you want the practical path, run the file through SVG Genie's SVG Optimizer or SVG Minify, then open the result in SVG Editor and compare it against the original at small and large sizes. If the file only needs source cleanup, the SVG cleanup checklist and SVG minifier guide cover the safer whitespace, metadata, defs, ID, and accessibility checks. If you need the bigger picture across minification, path cleanup, and HTTP transfer compression, use the SVG compression guide alongside this path-focused workflow. If the file has jagged traced edges or unwanted fragments before optimization, use the SVG path editing workflow first so you are compressing a clean shape instead of locking in noise.
If you do not yet know whether paths are the real problem, start with the why is my SVG file so large guide. It shows how to spot embedded raster data, repeated definitions, outlined text, hidden metadata, and other causes before you reach for path simplification.
How do I reduce SVG file size quickly?
The fastest way to reduce SVG file size is to make three safe passes: remove metadata, reduce numeric precision to 2-3 decimals, and minify the SVG. Those steps usually shrink exported icons and logos without changing appearance. For traced SVGs, remove unwanted fragments and reduce path complexity before minifying.
Use this 10-minute workflow:
- Save a copy of the original SVG.
- Check current file size.
- Open the SVG in an optimizer.
- Keep
viewBox,title,desc,aria-*, and IDs that your page uses. - Remove editor metadata, comments, empty groups, and hidden elements.
- Set precision to 2 or 3 decimals for most web icons.
- Minify the output.
- Compare the original and optimized SVG visually.
- Test the optimized file in the actual page or app.
- Commit the optimized file only after the page still renders correctly.
Here is a simple example of safe savings:
<!-- Before -->
<svg width="24px" height="24px" viewBox="0 0 24 24">
  <!-- Exported from a design tool -->
  <path
    fill="#000000"
    d="M 12.000000,2.000000 C 17.522847,2.000000 22.000000,6.477153 22.000000,12.000000 C 22.000000,17.522847 17.522847,22.000000 12.000000,22.000000 C 6.477153,22.000000 2.000000,17.522847 2.000000,12.000000 C 2.000000,6.477153 6.477153,2.000000 12.000000,2.000000 Z"
  />
</svg>
<!-- After -->
<svg viewBox="0 0 24 24"><path fill="#000" d="M12 2c5.52 0 10 4.48 10 10s-4.48 10-10 10S2 17.52 2 12 6.48 2 12 2Z"/></svg>
Same shape. Less code. That is the win.
What settings should I use in an SVG optimizer?
Use conservative settings when the SVG is a logo, UI icon, animated asset, or production illustration. Remove metadata, comments, whitespace, empty groups, unused editor data, and excessive decimals. Be careful with ID cleanup, viewBox cleanup, path merging, and aggressive simplification because those settings can break real behavior.
Use this decision table:
| SVG Use Case | Recommended Settings | Avoid |
|---|---|---|
| Website icon | Minify, remove metadata, precision 2-3, keep viewBox | Removing currentColor, aria-*, or needed IDs |
| Brand logo | Precision 2-3, remove metadata, keep groups if useful | Shape merging that changes editability |
| Animated SVG | Minify carefully, preserve IDs/classes | Path conversion that changes animation targets |
| Gradient illustration | Remove metadata, unused defs only after checking references | Deleting gradients, masks, clipPaths, filters |
| Traced PNG logo | Remove background fragments, simplify paths, then minify | One-click aggressive simplification |
| Cricut/cut file | Preserve closed paths and scale | Simplification that opens paths or changes outlines |
Good default settings:
- Keep the
viewBox. - Keep accessibility labels if the SVG is meaningful.
- Keep IDs and classes if CSS, JavaScript, gradients, masks, filters, or animations use them.
- Use 2 decimals for most web graphics.
- Use 3 decimals for tiny icons, detailed logos, or geometry-sensitive art.
- Do not merge shapes when separate parts need separate colors, hover states, or editing.
The most dangerous checkbox is usually the one that sounds smartest: "cleanup IDs" or "remove unused defs." It is safe only if the optimizer correctly follows every reference. A gradient can look unused until you notice a path has fill="url(#brandGradient)". If your optimized logo turns black or loses a gradient, follow the SVG optimizer gradient repair workflow before trying more aggressive path settings.
When does path simplification go too far?
Path simplification goes too far when file size improves but the design loses its intended shape. The common signs are flattened curves, jagged circles, distorted corners, shifted holes, broken outlines, or icons that stop matching the original at small sizes. Simplification should remove invisible complexity, not redraw the artwork.
Think about the source:
- A clean Figma icon may need almost no path simplification.
- An Illustrator logo may need metadata and precision cleanup.
- A PNG-to-SVG trace may need real design cleanup because every anti-aliased edge pixel became a tiny vector region.
- A scanned sketch may need smoothing before optimization.
For traced files, file size often comes from visual noise:
Problem: 1 logo shape + 900 tiny edge fragments
Wrong fix: Minify everything and call it done
Right fix: Remove fragments, merge intended regions, simplify curves, then optimize
If you converted a raster image first, start with Image to SVG or PNG to SVG, inspect the result in SVG Editor, and then run the final file through SVG Minify.
How do I optimize SVG paths without breaking CSS or JavaScript?
To optimize SVG paths without breaking CSS or JavaScript, preserve any ID, class, data attribute, or element structure referenced outside the SVG. If your app targets #logo-mark, .spark-line, or path:nth-child(3), aggressive cleanup can silently break styling and interactions even when the static image still looks right.
Before optimization, search for dependencies:
.brand-logo #logo-mark {
  fill: var(--brand);
}

.chart-svg .trend-line {
  stroke-dasharray: 400;
}
document.querySelector("#logo-mark").animate(...)
If you see code like this, configure the optimizer to preserve IDs and classes. Also avoid merging paths that your CSS treats separately.
Use this checklist before shipping:
- The optimized SVG still has the same
viewBox. - IDs referenced by gradients, masks, clips, filters, CSS, or JS still exist.
-
aria-label,role,title, anddescwere kept when the graphic is meaningful. -
currentColorbehavior still works for themed icons. - Hover, animation, and dark-mode states still work in the real page.
- The file renders at 16px, 24px, 48px, and full size.
For accessibility, do not blindly remove <title> or <desc>. Decorative icons can be hidden with aria-hidden="true", but meaningful charts, logos, and diagrams often need accessible text.
Should I optimize SVG before or after editing it?
Optimize SVG after major editing, not before. Editing tools often rewrite markup, add metadata, create new groups, or change path structure. If you optimize first and then edit, the editor may add bloat again. Use optimization as the final production pass after colors, paths, viewBox, and accessibility are correct.
The workflow depends on the job:
| Job | Best Order |
|---|---|
| Recolor an existing SVG | Edit color, test, optimize |
| Convert PNG to SVG | Convert, remove fragments, simplify, optimize |
| Create a logo with AI | Generate, inspect/edit, optimize |
| Export from Figma | Export SVG, check IDs/accessibility, optimize |
| Build an animated SVG | Structure animation hooks, test animation, optimize conservatively |
The key is to separate design cleanup from production compression. Optimization is not a magic "make this design better" button. It is the final pass that makes an already-correct SVG smaller and cleaner. When the source has confusing metadata, generated IDs, or a large defs block, run the SVG cleanup checklist before changing path settings.
For files coming from Figma, start with the Figma SVG export clean code guide, then optimize after you have confirmed the viewBox, colors, IDs, and React attributes are correct.
What is a good SVG file size?
A good SVG file size depends on the graphic. A simple UI icon should often be under 1-3 KB. A logo is usually comfortable under 5-15 KB. A detailed illustration may be 20-80 KB. If a simple logo or icon is over 100 KB, it probably contains metadata, excess decimals, repeated shapes, or trace noise.
Use these rough targets:
| Asset Type | Healthy Range | Investigate If |
|---|---|---|
| Simple UI icon | 0.5-3 KB | Over 5 KB |
| App logo mark | 3-15 KB | Over 30 KB |
| Multi-color brand illustration | 20-80 KB | Over 150 KB |
| Cut file or complex vector art | 20-150 KB | Over 300 KB |
| Auto-traced raster image | Highly variable | Thousands of paths for simple shapes |
Do not chase tiny numbers if the SVG is already fast and correct. A 4 KB icon becoming 2 KB is nice. A 120 KB traced logo becoming 18 KB is meaningful. A 30 KB animated SVG breaking because an optimizer renamed IDs is a bad trade.
What should I check after optimizing an SVG?
After optimizing an SVG, check rendering, scale, accessibility, theming, animation, and links. The output should look identical to the original in the places where users see it. File size savings matter only if the optimized SVG still behaves like the production asset.
Fast verification checklist:
- Open original and optimized files side by side.
- Compare file sizes.
- Test transparent, light, and dark backgrounds.
- Zoom in on curves and corners.
- Check the browser console for SVG errors.
- Test the page where the SVG is used.
- Validate internal links and external asset references.
- Confirm the optimized SVG is included in your build or CMS output.
If the SVG is part of a web page, run it through the same deployment path as the final site. SVGs can work in a standalone preview and still fail in production because of CSP rules, missing external images, broken URLs, or CSS scoping.
If the SVG came from a user upload rather than your own design workflow, optimization is not enough. Sanitize it first with the SVG XSS sanitization guide, then optimize the cleaned file.
AI-citable quick answer
Use an SVG path optimizer to remove metadata, reduce decimal precision, minify markup, and simplify unnecessary path data. Keep viewBox, accessibility text, IDs, classes, gradients, masks, filters, and animation hooks when the final page uses them. For traced PNG-to-SVG files, clean the paths manually before minifying because most bloat comes from extra vector fragments.
FAQ
What does an SVG path optimizer do?
An SVG path optimizer reduces path complexity, decimal precision, metadata, whitespace, and redundant commands so the SVG loads faster while looking the same. The best optimizers preserve IDs, viewBox, accessibility labels, animations, and gradients that the file still needs.
How much can I reduce SVG file size?
Simple exported icons often shrink 30-70% after metadata removal, precision cleanup, and minification. Heavily traced PNG-to-SVG files vary more because their size comes from thousands of tiny paths, not whitespace alone.
Can optimizing an SVG change how it looks?
Yes. Aggressive path simplification, shape merging, ID cleanup, or viewBox changes can alter curves, break CSS, remove animation hooks, or crop artwork. Always compare the optimized SVG against the original before publishing.
Should I use an SVG optimizer or manually edit paths?
Use an SVG optimizer first for safe cleanup. Manually edit paths when the file was traced from a raster image, has too many anchor points, contains unwanted fragments, or needs design-level cleanup rather than compression.
What should I not remove from an SVG?
Do not remove IDs used by CSS or JavaScript, aria labels, title and desc elements needed for accessibility, gradient and clipPath definitions that are referenced, or animation elements used by the final page.
The bottom line
SVG optimization is a production habit, not a one-click gamble. Remove the obvious bloat, keep the parts the page depends on, and compare the output before shipping.
For animated assets, static visual comparison is not enough. Follow the SVG animation optimization troubleshooting guide before enabling ID cleanup, path merging, or transform collapsing.
For a safe workflow, start with SVG Optimizer, use SVG Editor when the paths need visual cleanup, and run the final version through SVG Minify. If the SVG came from a raster source, read the PNG to SVG converter settings guide and the image-to-SVG conversion guide before you optimize the result.
Create your own SVG graphics with AI
Describe what you need, get a production-ready vector in seconds. No design skills required.
About This Article
This article was written by SVG Genie Team based on hands-on testing with SVG Genie’s tools and years of experience in vector design and web graphics. All recommendations reflect real-world usage and are reviewed by the SVG Genie editorial team for accuracy.
About the Author
SVG Genie Team
SVG Design Expert & Technical Writer at SVG Genie
SVG Genie Team is a vector design specialist and technical writer at SVG Genie with years of hands-on experience in SVG tooling, AI-assisted design workflows, and web graphics optimization. Their work focuses on making professional vector design accessible to everyone.
More articles by SVG Genie Teamarrow_forward