A bitmap logo looks fine at 300 pixels wide, then turns soft on a banner, sticker, or high-density screen. Merely saving it with an .svg extension will not fix that. The pixels have to be traced into real vector geometry.
The fastest way to convert a bitmap to SVG is to start with the cleanest available image, remove unnecessary background detail, trace it with an image-to-SVG converter, and inspect the result at both small and large sizes. Logos, icons, signatures, and line art usually convert well. Photos and textured artwork usually do not.
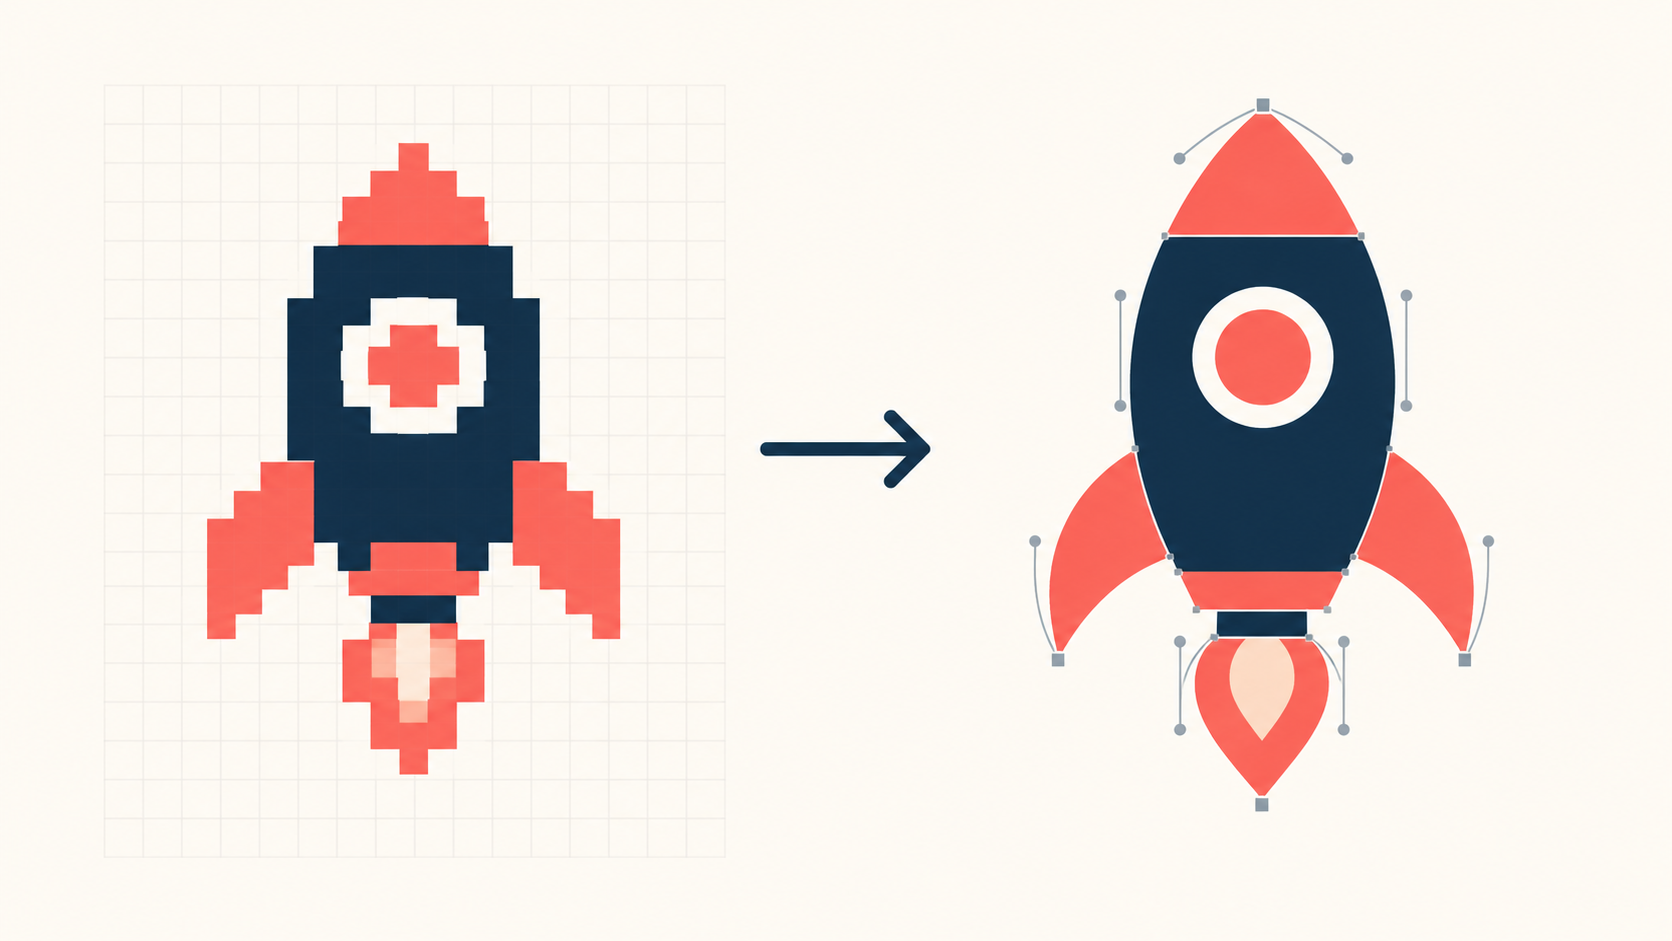
What is a bitmap-to-SVG conversion?
Bitmap-to-SVG conversion is the process of translating a grid of colored pixels into scalable vector paths, shapes, and fills. The converter detects boundaries and color regions, then approximates them with mathematical geometry that can be enlarged without developing pixelated edges.
A bitmap is a raster image made from pixels. Common bitmap formats include PNG, JPG, BMP, and WebP. SVG is a vector format that describes graphics using elements such as paths, circles, rectangles, fills, and strokes. MDN's SVG overview explains how browsers render this geometry.
This distinction matters because there are two very different ways to put a bitmap into an SVG file:
- Embed the bitmap: the SVG acts as a container, but the artwork is still made of pixels.
- Trace the bitmap: the visible artwork becomes paths and shapes, creating a genuine vector result.
If your goal is sharp scaling, editable colors, cutting-machine compatibility, or compact logo artwork, you want traced paths—not an embedded image.
How do I convert a bitmap to SVG?
Use the highest-quality bitmap you can find, upload it to a tracing tool, select a preset that matches the image, preview the conversion, and export the SVG. The entire first pass can take less than a minute when the source has a plain background and clearly separated shapes.
Here is the shortest reliable workflow:
- Find the original PNG, BMP, JPG, or WebP rather than a screenshot or chat attachment.
- Crop empty space and remove any unwanted background.
- Open the Image to SVG converter and upload the bitmap.
- Choose a logo or icon preset for flat artwork; use a detailed preset only when the detail is intentional.
- Compare the preview with the source at 100% and at a much larger size.
- Export the SVG and open it in an SVG editor to remove stray shapes or adjust colors.
- Test the final file where it will actually be used.
Do not begin by maximizing detail. For most logos and icons, fewer clean paths beat hundreds of paths that preserve every anti-aliased pixel. If the input is a PNG, the PNG-to-SVG settings guide gives a more specific starting point for smoothing, colors, and noise removal.
Which bitmap images convert well to SVG?
Bitmaps convert well when the artwork already behaves like vector art: distinct edges, limited colors, simple shapes, and little texture. Conversion becomes less reliable as the source adds blur, noise, subtle gradients, photographic lighting, or tiny text.
Use this decision table before spending time on cleanup:
| Bitmap content | Expected result | Best approach |
|---|---|---|
| Flat logo on a plain background | Excellent | Automatic trace, then inspect text and corners |
| One-color icon or silhouette | Excellent | Trace with a low color count |
| Signature or black line art | Very good | Increase contrast, then trace |
| Simple illustration | Good | Preserve its intentional color regions |
| Small or blurry logo | Mixed | Find a larger source or recreate key shapes |
| Screenshot with text and UI | Mixed to poor | Rebuild text and interface elements manually |
| Product photo or portrait | Poor as a general-purpose vector | Keep as JPG, PNG, AVIF, or WebP |
| Painting, texture, or soft gradient | Poor | Keep raster or make a deliberately simplified illustration |
The goal is not to prove that every bitmap can become an SVG. The goal is to choose the format that produces the cleanest output with the least work.
Which source format should I use: PNG, JPG, BMP, or WebP?
PNG is usually the best bitmap source for logos, icons, and flat graphics because it uses lossless compression and supports transparency. JPG is acceptable for photos but can add block artifacts around sharp edges. BMP may preserve pixels cleanly but creates large files. WebP quality depends on how it was exported.
| Source format | Best for | Watch out for |
|---|---|---|
| PNG | Logos, icons, transparent artwork | Low-resolution exports still lack detail |
| JPG/JPEG | Photographic sources | Compression blocks and halos become traced shapes |
| BMP | Uncompressed or legacy artwork | Large source files and no inherent vector information |
| WebP | Web images and modern exports | Lossy versions may contain edge artifacts |
Changing a JPG into a PNG before tracing does not restore lost quality. It only puts the same pixels in a new container. If JPG artifacts are already visible, locate the original design export or clean the image before conversion. For a dedicated JPG workflow, see how to convert JPG to SVG.
How should I prepare a bitmap before vectorizing it?
Prepare a bitmap by removing irrelevant background pixels, increasing contrast where boundaries are unclear, and using the largest clean source available. Avoid aggressive sharpening and AI upscaling unless you compare the altered edges with the intended design; invented detail can become permanent vector geometry.
Use this preflight checklist:
- Use the original export rather than a screenshot.
- Prefer a transparent PNG for a logo without a background.
- Crop excess canvas around the artwork.
- Remove dust, JPG blocks, and isolated pixels.
- Make the subject clearly distinct from the background.
- Keep intentional sharp corners sharp.
- Rebuild tiny text separately when the font matters.
- Save an untouched copy of the source.
A two-color mark does not need a 20-color trace. A hard-edged icon does not need heavy smoothing. Match the preparation and settings to the visual structure of the source, not simply to its file extension. The longer image preparation guide covers faded scans, photographed artwork, and low-resolution sources.
Why does the converted SVG have too many paths?
A converted SVG gets too many paths when the tracer interprets compression noise, anti-aliasing, texture, shadows, or subtle color differences as meaningful shapes. Lower the color count, remove background noise, and trace only the visual information the design actually needs.
Common warning signs include:
- the SVG is larger than the bitmap
- the editor selects hundreds of tiny fragments
- flat areas contain multiple nearly identical colors
- edges show small bumps or speckles
- a simple logo becomes slow to edit
Fix the source before applying an optimizer. Optimization can shorten coordinates and remove redundant markup, but it cannot decide that a traced shadow or dust speck was never part of the design. Once the artwork is visually correct, use an SVG optimizer to reduce unnecessary code safely.
Why does my bitmap-to-SVG result look blurry or jagged?
Jagged paths usually come from a low-resolution or compressed source, while an overly soft result usually comes from too much smoothing. Start with a larger source, then adjust smoothing gradually. If the trace changes the identity of a logo or letterform, stop and recreate that element rather than forcing the settings.
Use the visible symptom to choose the fix:
| Symptom | Likely cause | First fix to try |
|---|---|---|
| Stair-step edges | Tiny source image | Find a larger original |
| Wobbly straight lines | Compression or scan noise | Clean the source and reconvert |
| Rounded-off corners | Too much smoothing | Reduce smoothing or preserve corners |
| White halo | Matte pixels around a removed background | Clean transparent edges before tracing |
| Warped lettering | Raster text was traced as shapes | Rebuild text from the font or source file |
| Missing small shapes | Noise removal is too strong | Lower filtering selectively |
The bad image-to-SVG conversion guide has a symptom-by-symptom repair flow for white boxes, huge files, distorted text, and messy backgrounds.
Does converting a bitmap to SVG improve image quality?
Converting a clean bitmap can produce edges that scale smoothly, but conversion does not recover missing information. A vectorizer estimates shapes from the pixels it receives. It cannot know the exact curve, font, or hidden detail that existed before the image was rasterized.
Think of conversion as reconstruction, not enhancement. A crisp 2000-pixel logo gives the tracer strong boundary evidence. A 100-pixel thumbnail gives it guesses. AI-assisted tools can make better guesses, but a guess is still not the original design.
For casual use, an accurate-looking trace may be enough. For a master brand file, packaging, large signage, or precision fabrication, compare the SVG carefully and manually recreate any shape whose exact geometry matters.
When should I keep the bitmap instead of converting it?
Keep the bitmap when continuous tones, realistic texture, lighting, or photographic detail are essential. SVG is efficient for geometry; raster formats are efficient for pixel-rich imagery. A photo converted into thousands of vector regions can look worse, load slower, and be harder to edit than the original.
Keep PNG, JPG, AVIF, or WebP for:
- photographs and portraits
- realistic product shots
- complex paintings and textures
- screenshots that must preserve every pixel
- artwork with many soft gradients
Convert to SVG for:
- logos and wordmarks
- icons and symbols
- signatures and line art
- diagrams and simple illustrations
- assets that require color editing or fabrication paths
If you are unsure, convert one representative image and compare file size, edge quality, editability, and appearance at the intended display size. The better format is the one that survives the real job—not the one with the more fashionable extension.
What is the best bitmap-to-SVG workflow for a clean result?
The best workflow separates tracing from cleanup and validation: prepare the source, generate a restrained first trace, correct visible geometry, optimize only after approval, and test the file in its destination. This order prevents technical cleanup from hiding a fundamentally bad conversion.
Use this final sequence:
- Prepare: choose the cleanest source and remove irrelevant pixels.
- Trace: use the simplest preset that preserves the intended design.
- Compare: inspect silhouettes, holes, corners, text, and colors.
- Edit: remove artifacts and recreate precision elements when necessary.
- Optimize: simplify markup without changing appearance.
- Validate: test the SVG in a browser, editor, print workflow, or cutting application.
Start with SVG Genie's image-to-SVG converter, then inspect the output instead of treating the first download as automatically finished. A minute of review is usually cheaper than discovering a warped logo after it reaches production.
FAQ
How do I convert a bitmap to SVG?
Upload a clean, high-resolution bitmap to an image-to-SVG converter, choose settings that match the artwork, preview the traced paths, and export the SVG. Flat logos, icons, signatures, and line art usually convert best; photographs often work better as raster files.
Does converting a bitmap to SVG improve its quality?
Conversion can create scalable edges, but it cannot recover detail missing from the source. A clean bitmap can produce a clean SVG; a tiny, blurry, or heavily compressed bitmap may need cleanup or manual recreation first.
What bitmap formats can be converted to SVG?
PNG, JPG, BMP, and WebP images can all be used as bitmap sources. PNG is usually the best starting point for logos because it supports transparency and avoids the block artifacts introduced by JPG compression.
Why is my converted SVG larger than the bitmap?
The SVG is larger when the converter creates too many paths to represent texture, gradients, shadows, noise, or many similar colors. Reduce unnecessary detail and colors, remove the background, or keep photo-like artwork in a raster format.
Is a bitmap inside an SVG a real vector?
No. An SVG can embed a bitmap image, but that image still consists of pixels and will blur when enlarged. A true bitmap-to-vector conversion rebuilds the visible artwork as paths and shapes.
Create your own SVG graphics with AI
Describe what you need, get a production-ready vector in seconds. No design skills required.
About This Article
This article was written by SVG Genie Team based on hands-on testing with SVG Genie’s tools and years of experience in vector design and web graphics. All recommendations reflect real-world usage and are reviewed by the SVG Genie editorial team for accuracy.
About the Author
SVG Genie Team
SVG Design Expert & Technical Writer at SVG Genie
SVG Genie Team is a vector design specialist and technical writer at SVG Genie with years of hands-on experience in SVG tooling, AI-assisted design workflows, and web graphics optimization. Their work focuses on making professional vector design accessible to everyone.
More articles by SVG Genie Teamarrow_forward